Fireplace Surround
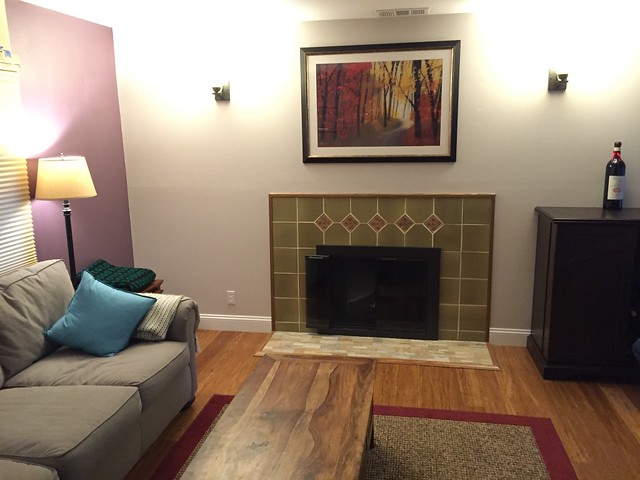
I’d never seen a fireplace dressed so poorly. The fact that there wasn’t even a mantel to hang stocking from was a bit shocking. We moved into our house in July. I had no means by which I’d be able to build a mantel; no tools, no shop. We’d have to spend that December with our sad tile backed fireplace.
By next year we’d have a proper mantel. The only thing in my way was a lack of design, tools, materials, and experience. I set out to rectify all of that.
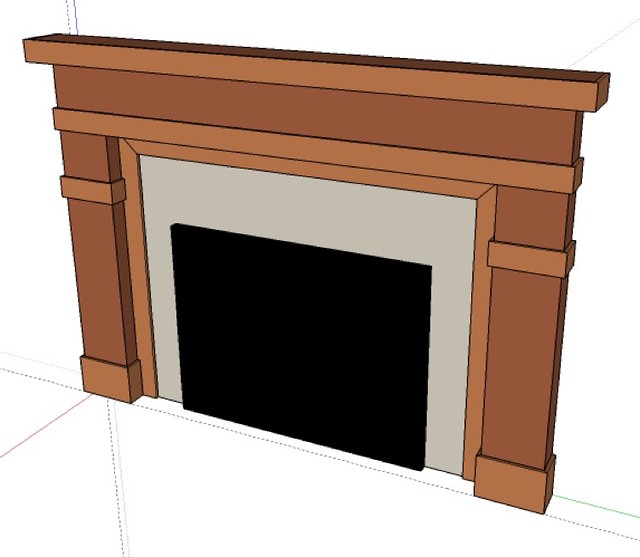
First was the design. I needed to know what I’d need to learn. We wanted a simple design, nothing ornate. The Shaker aesthetic is very appealing to both of us. I scoured the internet for ideas and finally hit on one that we both liked. The design is clean and simple with some small accents that keep it from being boring.
While we liked the overall design, I thought using different species would bring it to life a bit more. I wanted the accents to be subtle, but present. To that end, I was going to use mahogany and cherry.
After deciding on design and materials, I built the surround in SketchUp. Using the bricks in the original image as a reference, I was able to determine the dimensions and proportions then adjust them to fit our need.
Now to build it! Only, I was still lacking tools, materials, and experience. As a way to build skills and justify tool purchases, I built the kids a playhouse and renovated our main bathroom over the following few months. All the while, I mulled over the design details of the fireplace.
On such detail was the face of the surround. I wanted to break it up a bit, rather than having one full horizontal face. I played with setting slats of veneer at an angle. My thinking was that it would provide subtle visual interest.
The other design detail was the species of wood to use. Having two young kids and a full time job, I don’t get much time to myself. Poking around a lumber yard for hours on a weekend just wasn’t going to happen. Instead, I found Hardwood to Go. The had good pictures of their stock and would ship boards anywhere. Looking through the site, I found a board of utile and one of sepele that I really liked. The price and dimensions would work perfectly. I took a chance and made the purchase.
Finally I had all the pieces in place. My skills at finer woodworking were (are) still lacking, but I’ve found that the best way to learn is to do.
I built the frame of the surround in half inch plywood. That ended up being a mistake. I think it was too thin as it started to bow after awhile. I switched to three quarter inch MDF instead. Then I learned how horribly dusty MDF is when it’s milled. I don’t have dust collection and my shop is too small to be able to work inside. The wind picked up the dust and blew it everywhere. Oops. Had to press on, anyway.
That wasn’t the last lesson I’d learn the hard way. For construction, I thought I’d build a frame from plywood (now MDF) then skin that in solid hardwood. I started re-sawing the utile on the band saw and completely mucked it up. The blade drifted so badly that the thickness of the board changed by a full eighth of an inch. There was now no chance I’d be able to use it as solid wood. My fix was to first buy a better blade and practice re-sawing; then to slice thinner boards and laminate them to yet more MDF. From there I could plane them smooth.
After lamination, I ripped a miter on all the faces for the side columns and glued them to the frames. Then filled the imperfect miters with sawdust and epoxy.
The chevrons for the face of the surround were laminated on. Then I had to plane them by hand as they wouldn’t fit through my planer. Here I learned another hard lesson. Be very aware of grain direction. I kept getting really horrible gouges. I think a big reason was that I mismatched the grain directions. The other was that my plane was probably set too aggressively (it’s also a cheap plane that I’ll never use again).
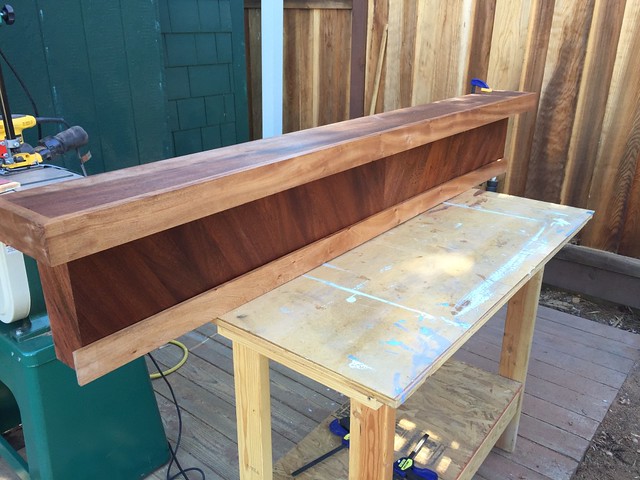
Eventually I got all the major pieces glued together. I also milled the sepele accents and the top of the mantel. The top and the accents are the only solid hardwood pieces.
I dry fit the whole thing on the workbench. And started to get really excited about how it was turning out.
I also couldn’t resist rubbing some mineral spirits on the mantel to get a better look at how it would end up.
I finished sanding and coated it with Odie’s Oil and set it aside. Then I turned my attention to demolishing out the old tile. I spent a couple of hours hammering, prying, and scraping off the ugly.
I mounted new cement board that I could adhere new stone tile to. I found the same stone tile used for the hearth and thought it’d look good continuing up the wall.
Finally, after months of planning and work, I mounted the surround. The top and columns are separate pieces. The accent along the bottom of the face hides the seam. That way I could place and level each part individually. To make leveling the top easier, everything is hung on cleats. That way I only had to level the cleat rather than trying to hold the heavy top up, get it level, then mount it. Once the cleats were on the wall, I glued the wall and surround cleats together and added a couple screws so it wouldn’t accidentally fall off.
I’m really happy with how it turned out. I think it’s beautiful. There are countless imperfections and I’m sure some poor choices, but I’m really proud of it. The living room feel much warmer and I smile every time I look at it.


